Roofs are built to last. Many can go 40 to 50 years with the right care! But even the toughest tiles aren’t completely safe from nature’s surprises. High winds, heavy rain, and stray debris can chip, crack, or even dislodge tiles, sometimes sooner than we’d like.
Whether you’re repairing a leak, restoring your roof’s original charm, or just starting fresh, chances are you might need to replace a tile or a few here and there. But having heard the stories about how easily roof tiles can crack or break, taking on the job can feel a little daunting, which is why taking the right approach is so important.
So, if you’re planning to tackle it yourself, this guide will walk you through everything you need to know about how to remove and replace roof tiles safely and efficiently.
Key Takeaways
Understand Your Roof Tiles: Different types, concrete, clay/terracotta, slate, and synthetic, vary in weight, fragility, and ease of removal, so knowing your material helps prevent damage.
Recognise When Tiles Need Replacing: Look for cracked, chipped, or loose tiles, water leaks, mould, rising energy bills, sagging areas, or crumbling terracotta as clear signs it’s time for replacement.
Prepare Before You Start: Inspect your roof for damage or hazardous materials, check structural timbers, and plan the removal on mild, dry days to reduce risks.
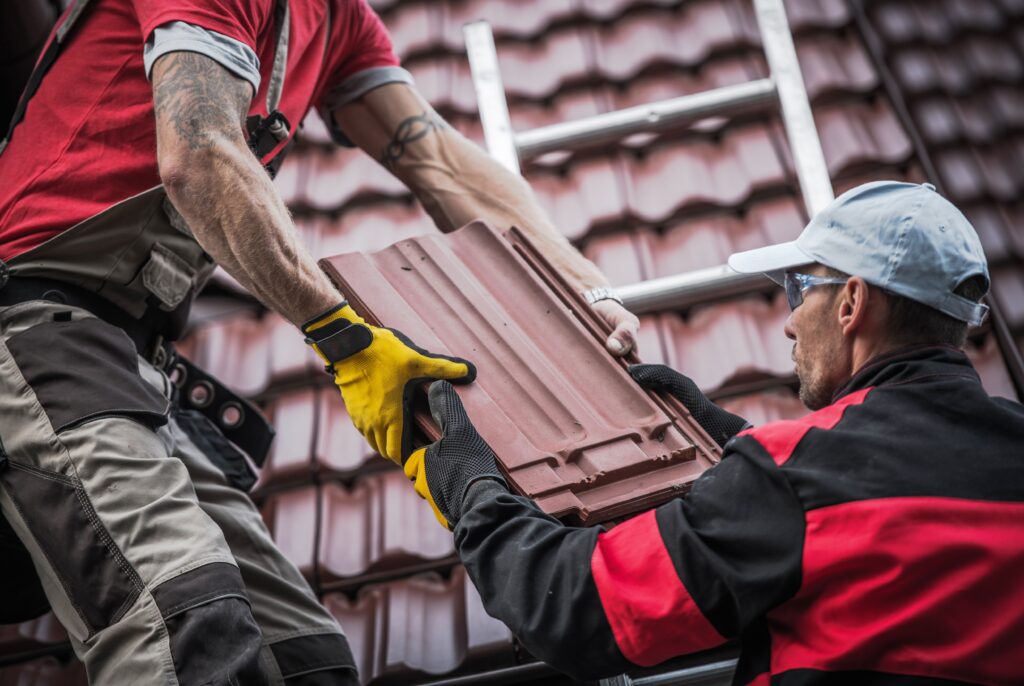
Use the Right Tools and Safety Gear: Pry bars, pliers, rubber mallets, safety harnesses, gloves, helmets, and non-slip footwear make removal safer and more efficient.
Follow Proper Removal and Replacement Techniques: Lift adjacent tiles carefully, remove fasteners gently, slide out damaged tiles, inspect underlayment, and install new tiles while preserving surrounding ones.
Prevent Tile Breakage: Handle tiles steadily, cushion them with towels or cloths, work systematically, and use safety boards or harnesses to distribute weight and reduce pressure.
Post-Removal Steps are Essential: Inspect underlayment, clean debris and dust, store or recycle old tiles, and check the entire roof for weak spots before installing replacements.
Know Your Roof Tile
Before you start removing or replacing tiles, it’s important to understand what you’re working with. Roof tiles come in a few different types, each with its own strengths, lifespan, and quirks:
Concrete Tiles: Made from a mix of cement, sand, and water, concrete tiles are durable and can last 30–50 years. They’re relatively heavy, which makes them sturdy but slightly harder to remove and replace without the right tools and care.
Clay/ Terracotta Tiles: Crafted from natural clay and fired at high temperatures, clay tiles are lightweight yet fragile. They can last 50–100 years and offer excellent thermal properties, but they crack more easily during removal, so extra caution is needed.
Slate Tiles: Slate is a natural stone that is extremely long-lasting. But it can be very heavy and brittle, making it the most challenging tile to remove or replace safely. Professional assistance is highly recommended.
Synthetic Tiles: Made from polymers or recycled materials, synthetic tiles are lightweight and designed to mimic the look of traditional options like slate or clay. They’re easier to handle and can be a good choice if weight is a concern.
Know When and Why to Remove Roof Tiles
Replacing damaged or aging tiles restores your roof’s watertight seal, prevents structural damage, and can even improve energy efficiency. Regular inspections can catch these problems early, helping you address minor issues before they turn into expensive, stressful repairs.
But, knowing when to remove roof tiles is just as important as knowing how to do it – preventing unnecessary replacements or repairs with replacements gone wrong.
Fortunately, there are several clear indicators that suggest it’s time to remove and replace roof tiles:
Cracked, chipped, or loose tiles: Look for splits, missing pieces, or tiles that shift out of place. These gaps allow water to seep in, weakening the roof’s structure over time.
Water leaks or mould under the roof: Damaged tiles let moisture in, leading to ceiling stains, damp spots in the attic, and mould growth. Left unchecked, this moisture can rot wooden beams and compromise your home’s structure.
Rising energy bills: Broken or damaged tiles can affect your roof’s insulation, making your home less energy-efficient.
Sagging or uneven areas: These may indicate structural issues that require immediate attention.
Fretting or crumbling terracotta tiles: Older roofs, especially those over 40 years old, may show signs of terracotta deterioration.
When a Full Roof Replacement is Needed
Sometimes repairing a few tiles isn’t enough. If more than half your roof’s tiles are damaged, water continues to seep in, or the roof is starting to sag, a full replacement may be the smarter long-term solution.
Preparing for Roof Tile Removal
Assessing Roof Conditions: Before climbing up, inspect your roof carefully. Older homes may contain hazardous materials such as asbestos, lead-based paints, or copper chromium arsenic (CCA) treated timber and disturbing these can be extremely dangerous. Look for visible signs of damage like water stains on ceilings, damp spots in the roof cavity, mould growth, or sagging areas, which indicate structural problems that need fixing. Check the roof timbers to ensure battens are still sound, as this will affect both safety and the success of your tile replacement.
Weather Considerations: Timing matters too. Dry days are best because wet tiles become slippery and harder to handle. Strong winds pose a major risk too, potentially dislodging tiles or breaking them during removal. If it’s windy, it’s safer to wait. Heat can also be an issue, as tiles and sealants expand and contract, increasing the risk of cracks. Aim for mild weather.
Tools and Safety Gear You’ll Need
Having the right equipment makes roof tile removal faster, easier, and safer:
Pry bar, pliers, and rubber mallet: A pry bar lifts tiles and removes fasteners efficiently. Needle-nose pliers help extract nails without damaging surrounding tiles, and gentle taps with a rubber mallet position tiles safely. A utility knife and measuring tape are useful for cutting underlayment and aligning tiles.
Safety harness, gloves, and helmet: Safety should always come first. Full-body harnesses with secure anchor points protect against falls. Heavy-duty gloves prevent cuts from sharp edges, and hard hats shield you from falling debris. Non-slip footwear provides traction, while protective eyewear and dust masks guard against airborne particles.
Buckets or bags for removed tiles: Keep your workspace organised with sturdy containers. Heavy-duty plastic buckets are perfect for intact tiles you plan to reuse, while construction-grade disposal bags work well for broken tiles and debris. Always follow local regulations for disposal or recycling.
How to Remove and Replace Roof Tiles
1. Lift Adjacent Tiles to Access the Target
Start by carefully lifting the tiles above and beside the one you need to replace. Slide a flat bar or a thin piece of wood underneath to create a small gap. Wooden wedges can hold these surrounding tiles in place while you work. Be gentle; too much force can crack the tiles, so take your time and lift steadily.
2. Remove Nails or Clips Gently
Check how the tile is secured. Clip-fastened tiles can often be unhooked by hand or with pliers. Nailed tiles require carefully pulling out the old nails with pliers, and wire-secured tiles may need cutting or untwisting. For wire tiles, you may need access to the roof’s underside.
3. Slide Out the Tile and Inspect the Area
Once the fasteners are removed, gently slide the damaged tile downward to avoid disturbing overlapping tiles. Take this opportunity to inspect the underlayment for rot, water damage, or wear. Repairing any issues before installing the new tile ensures long-term protection.
4. Install the New Tile
Choose a replacement tile that matches the existing pattern (check out ourtile finder for extra help!). Slide it upward from below and ensure it sits correctly on the battens. Secure it using the same method as the original (clips, nails, or adhesive.) Finally, return the surrounding tiles to their original positions to restore your roof’s uniform pattern.
Top Techniques to Prevent Tile Breakage
Roof tiles are fragile, so handling them with care is essential:
Lift and move tiles using steady, even pressure. Avoid quick or forceful movements.
Identify nails, clips, or mortar holding tiles in place before starting.
Use the right tools: a slate ripper for cutting nails in slate tiles, flat bars, and rubber mallets instead of regular hammers.
Warm weather makes tiles less brittle, but extreme heat can still cause cracks.
Safety boards or harnesses help distribute weight evenly, reducing the risk of stepping directly on tiles.
Use a towel or soft cloth to cushion tiles when handling or placing them on the roof or ground. This extra layer helps prevent scratches, chips, or cracks, especially with fragile clay or slate tiles.
Regular roof checks (twice a year and after major storms) help catch cracked, loose, or damaged tiles early. Prompt replacement prevents small problems from turning into structural issues and keeps your roof strong for years to come.
What to Do After Tile Removal
1.Check for Damage to the Underlayment: With the tiles removed, take a close look at the underlayment. Inspect for gouges, scratches, water damage, or rot that could compromise your roof’s integrity. Repair any uneven areas, replace damaged subfloor sections, and fill cracks with the proper materials to create a stable, secure base for your new tiles. Catching these issues early prevents bigger problems down the line.
2.Clean Debris and Dust from the Area: Tile removal creates dust and debris that can affect indoor air quality and make your workspace hazardous. Start by sweeping up larger particles, then use a vacuum for fine dust. Wipe down surfaces with a damp cloth, paying attention to exposed pipes, vents, and baseboards. Allow the area to air out properly before continuing work.
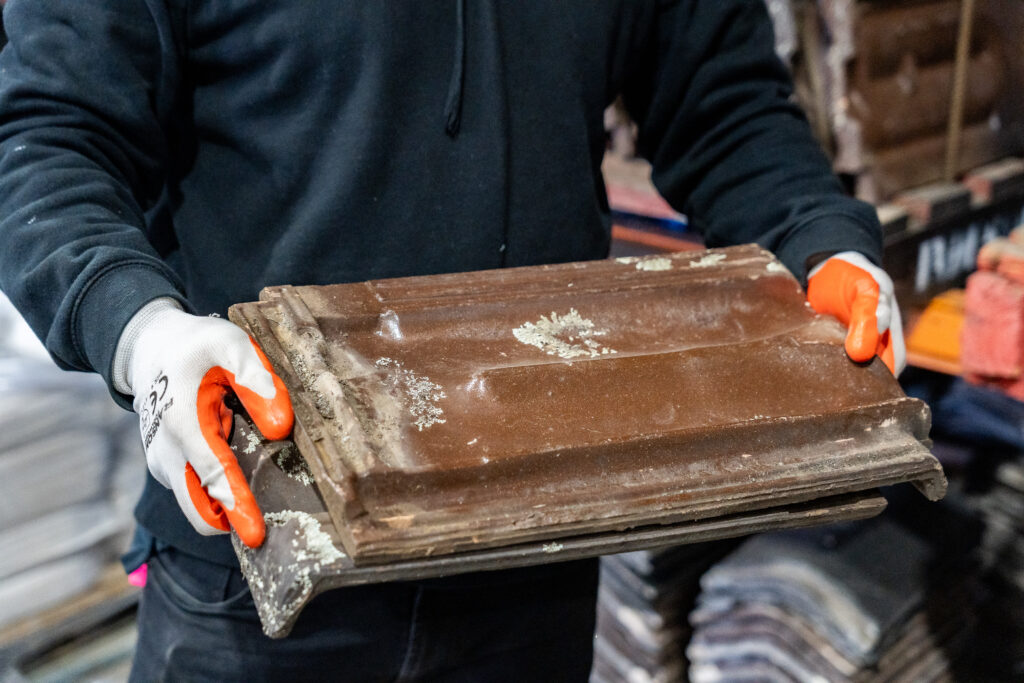
3.Store or Recycle Old Tiles: Tiles that are still in good condition can often be reused, saving money and reducing waste. For tiles that are no longer usable, recycling is a smart choice. Companies (like RoofBros) supply premium new and recycled roof tiles, making it easy to replace your roof sustainably.
4.Inspect the Roof for Other Weak Spots: Before installing new tiles, walk your roof and look for any remaining weak points. Check for leaks, water stains, or damp spots you might have missed. Ensure vents are clear and functioning properly, and check that insulation hasn’t shifted or compressed during tile removal. A thorough inspection now can prevent costly repairs later.
Safe Roof Tile Removal Made Simple
Removing and replacing roof tiles doesn’t have to be intimidating. With the right preparation, safety precautions, and careful technique, you can keep your roof in top shape. From knowing your tile type to handling, removing, and inspecting for damage, every step matters for a durable, leak-free roof.
At RoofBros, we make roofing simple. With over 20 years of combined experience, we supply premium new and recycled roof tiles designed to last. Whether you need a single replacement tile or a full roof upgrade, we buy and sell high-quality new and second-hand tiles to suit your project. Get started today and keep your roof safe, strong, and looking great!